0 Comments
Everyone loves an awesome Blacktron build. Ok, maybe it's just me. But I get a sense of immense joy seeing cool LEGO builds decked out in the distinctive black and yellow colors of the original LEGO bad guys, the Blacktron. I especially like when builders do mash ups with iconic things from other "universes" done in Blacktron style. So it is in that spirit that I present to you the Blacktron Imperial Shuttle. Head on over to the YouTube channel and let me know what you think. What other things should I Blacktronify? Is that even a word, "Blacktronify?" If not, it should be. One of my recent projects has been building a scale model of a World War II battleship, the Roma. I have always wanted to build a large navy ship and decided to go ahead and embark on the build. I chose the Roma because of the distinctive markings on the ship, especially the bold red and white diagonal strips on the deck of the ship. The ship is over 47 inches long, nearly as long as the UCS Super Star Destroyer I took photos along the way and decide to do a series of episodes on the PittBrickyard YouTube channel to showcase interesting things about the build. Episode I was posted. I also did a very quick #Shorts video with a quick preview of the finished build. I will be doing more of the longer build episodes. So stay tuned for that. 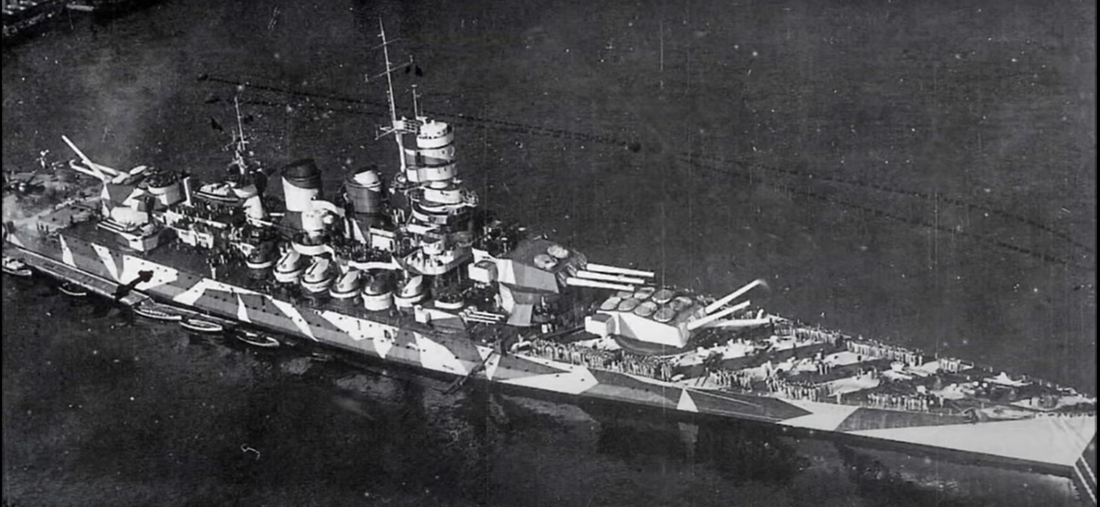 Yes, I know ... another mech build. I like building mechs. Actually, I have been spending most of my recent building time over the last month working on a much larger build which I plan to showcase soon on the PittBrickyard YouTube channel. But this past weekend, I wanted to take a break from that big build and work on a quick mech build that I had been thinking about recently. I had been mulling over the idea of doing a more agile, lithe sort of mech build. My usual mech builds have been more bulky with lots of heavy armor and accessories. So I took a break and knocked out this one this weekend. I like the black and tan color scheme and was happy with the movement that I was able to get out of it. Check out the YouTube video. I will eventually add it to the mech page when I get a chance.
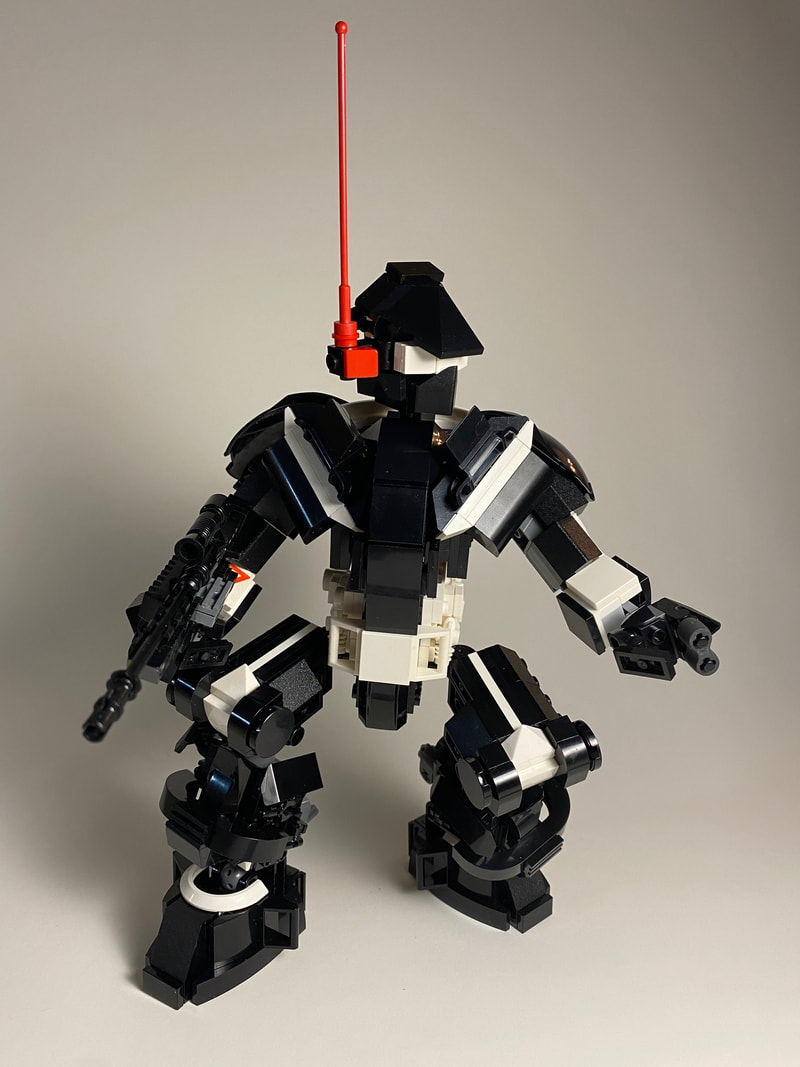
I uploaded a new video of my Black and White Mech No. 1 build. I am trying to do some quick video tours for the new YouTube "shorts" format. Going forward, I'll probably start doing long tour versions of my MOC videos on the regular YouTube format with a companion #shorts video.
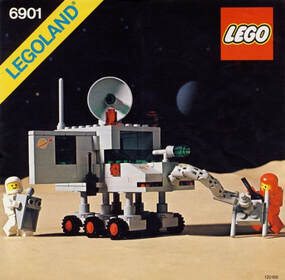
The rover features an ore drill that can be off loaded via the crane arm and several container boxes that are removable as well. The front tires are steerable with a technic rack and pinion set up and the rear tires are all independently sprung so they will move up and down over obstacles (better for Moon rock crawling!). Again, I should have a video posted showing the details in the rear future. 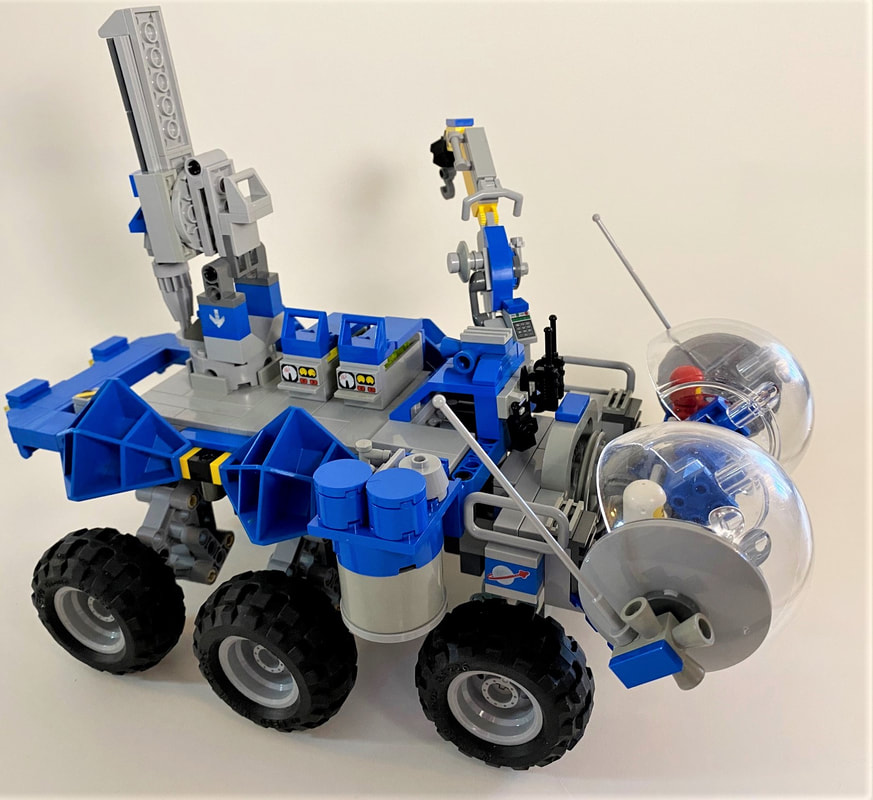 As promised, I waded into the project of trying to collect all of the pieces to build the Classic Space Mobile Lab set (LEGO Set Number 6901). I worked on it over the course of a couple of days, including this past weekend. Besides the usual satisfaction that I derive from sorting through bricks, this turned out to be particularly fun because my son got interested in helping me find the bricks. So it turned into a joint mission to hunt down the pieces. I have to hand it to my son who actually managed to find several of the pieces that I had overlooked. I was convinced that I would have to BrickLink the trans-green windshield part and he ended up finding it in the same transparent piece box that I was sure I had combed through ad nauseum. In my defense, I will contend that searching through that particular box of transparent bricks (all trans-color bricks) is like getting lost in a maze of funhouse mirrors. Still, he was able to find it. We have now found nearly all of the pieces. And I am quite convinced at least a handful of them came from the actual set that I first got some forty years ago. Kind of a cool thought. Alas, we have not tracked down all of the "hose" pieces along with a just few others. So I might have to resort to a very small BrickLink order. I hope to bring you photos of the rebuilt set when its done.  By the way, after helping me with finding the bricks for this set, my son decided to try his hand at rebuilding another old LEGO Space set (from a different Space subtheme from the late '90s). So I'll plan to show off that rebuilt set as well in another post.
My 17 inch tall mech build, the "Mächtig Jaeger," have been posted on the PittBrickyard YouTube Channel. I came up with this name because the build reminds me of a powerful Pacific Rim style "jaeger" mech. The idea behind this one was to do a large format mech with dark blue ("Earth Blue" in official LEGO color parlance) and orange colors. The challenge at this scale is to prevent it from collapsing under its own weight. I ended up completely rebuilding it, including redesigning the feet after an initial test build proved too flimsy. It stands well now and without support. However, because a push can send it toppling over, I have built a support display stand that can sit behind it and help prevent it from falling over when displayed for long periods (and to hopefully guard against it pitching over off my display shelf in the next California earthquake!). Check out the video for a full tour.
One improvement that I would make would be to replace the black brick to which the antenna is connected (a "Brick, Modified 1 x 1 with Studs on 4 Sides," sometimes called a "Travis Brick"). I really wanted to use a red brick there but, for some reason, could not find one in my giant drawer of SNOT bricks. I will keep an eye out and probably replace it the next time I see one turn up in one of my bulk LEGO brick bins. Check out more photos here.
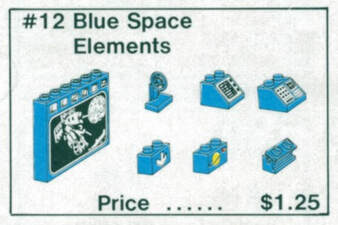
While I am on a Classic Space kick, I thought that I would write a bit about a few of my favorite elements from that era. In this post, I will be talking about the Classic Space control panel bricks—at least that is how I think of them. Yes, I know, these came to be used in many other types of sets as well. Still, they evoke Classic Space for me. In this post I will take a look at the original versions beginning in the early 1980s (actually 1979 to be exact).
The new lines introduced a wide range of new building elements, including the new control panel bricks. The new LEGOLAND Space sets were a watershed moment in the evolution of LEGO sets and a huge a step up in design from earlier sets with their much more limited part selection (compare them to sets such as the blocky Moon Landing set still in the LEGO catalogue as of the year before in 1978). The computer panel bricks were printed 2x2 45 degree bricks, often called “roof” or “slope” bricks which date back to the 1950s. Part 3039, the 45 degree “bevelled” brick was released in 1959. The 3039 element was released in 1979 with new computer panel prints for the LEGOLAND Space theme. There were two different computer panel prints done on the 3039 2x2 brick, and each was done in two different colors. The first sets in 1979 came in both blue and grey (of course, we are talking about the “old” LEGO grey color (before the reformulation to what is typically called now referred to as “light bluish grey”). Later these computer panels would come in white as well and were included in a broad range of town and space sets from 1979 on. The white version was mostly found in town sets and the blue version mostly (but not exclusively) in Space sets. So that makes six different combinations. Here they are with some more information on their production runs (based on the Bricklink database information):  Slope 45 2x2 with Computer Panel Pattern (Part No. 3039p34) (the “Button Panel”). According to Bricklink, this version had a release period from 1979 through 2001 and appeared in 67 sets. This version has a button panel on the left, a small monitor in the upper right hand corner with a panel of horizontal buttons below in the lower right hand corner.  Slope 45 2x2 with Computer Screen and Right Side Buttons Pattern (Part No. 3039p23) (the “Monitor Panel”). This element was in production from 1979 through 2003 and can be found in 71 sets. It has a larger monitor on the left hand side and three side buttons. And, while I must admit that I have never seen one, it appears that the Monitor Panel element was produced in red in one single set from 1985, the Delivery Center town set (Set No. 6377-1). If you have one in red, I would love to see a photo.
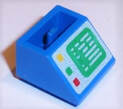
Blue Slope, Inverted 45 2 x 2 with Computer Screen and Left Side Buttons Pattern (Part No. 3660pb01). Of note is that there was actually a version of the inverted control panel that was only produced in 1979 and only appears in two sets from that year (in fact, two versions of the Alpha-1 Rocket Base set from 1979). It is different because the large monitor is on the right hand side when it is mounted, with the buttons on the left. If you have that set with this brick, I would also very much like to get a photo of that brick or any more information about how or why this variant exists.  Well, that concludes our in depth look at some old school control panel elements. If you are aware of any more information about these elements that may be of interest, I would love to get your comments and feedback.
Of course, there is no practical way that I could find the particular bricks from the set given that I now have several hundred thousand bricks in my collection. And it is quite possible that many of the bricks may have been lost by this time. That set was released in 1980 when I was six years old. However, I know that at least one particular piece from that actual set has remained with me all these years and I see it from time to time in a bin where it is stored (yes, kept for more than 40 years!). And there may be other distinctive parts—like the trans-green windshield and bricks or other printed bricks from the set—that I suppose I may get lucky and find. I have generally made a habit of segregating out some printed or unique older elements in my sorting and setting aside those older, special pieces when I run across them. So that is the first place that I will be looking. Then for the common bricks, I will try to stick to some level of fidelity by picking bricks in the “old grey” color as they would have been at the time. I may have to temper that against the time investment to gather the bricks if I can’t find a particular piece in the old color. The wheels should be easy, as I have a large bin of wheel components which I know has quite a few of older wheels used in the old Classic Space sets (i.e. the small ones with the red hubs). Well, I am embarking on this build and will update you later if I meet with success (or not).
I have posted up a video tour of my Dr. Seuss Build. |


 RSS Feed